
How to Use a Beard Shaping Tool
- Beard shaping tools are a simple and cost-effective DIY method to get the perfect beard lineup at home. If you’re going to the barber shop a couple of times a month at an average cost of $40 per haircut and trim, that’s a savings of $80 per month!
- Before you dive in, educate yourself on different face shapes and beard styles that are out there. This will allow you to pick a beard style that accentuates your stronger features and minimizes your weaker ones.
- When used correctly, beard shaping tools can give you an EPIC transformation. Check out this video from Tips for Clips with over 3 million views featuring our patented Aberlite Clearshaper.
Beard shaping tools are a quick way to get balanced and clean lines on your beard so you know exactly where to shave or trim.
We’ll show you how a beard shaping tool can help you achieve the beard of your dreams. This is mainly done by choosing the correct style for your face shape.
After that, we’ll go into detail on how to specifically use the different tools. Let’s get started.

Use a Beard Shaper for Professional Results at Home
There’s something special about going to the barbershop and getting a fresh beard shape-up.
You look in the mirror and feel like a new man. You get a lot of compliments on your beard and your confidence skyrockets.
However, about 3-5 days after your beard shape-up, your cheek fuzz starts to grow back in. The heavy stubble below your neckline makes an unwelcome comeback. You’re still the same confident guy, but you wish you could look the way you did after a barbershop visit all the time.
If only there were a way to make your beard shape up last longer…
We can’t say there’s a reliable way out there to make your beard lineup stay crispy until next weekend. But there is a way to reshape your beard — without spending money at the barbershop again.
Introducing… (drumroll please) beard shaping tools!

If you’re in the comfort of your home, or even around the globe on a business trip — you can use beard shaping tools to get the perfect beard lineup. If you’re traveling, the pain of finding a barber who can do justice to your glorious beard is a daunting task. In our experience, it involves going to many different barbers until you find the right one.

How Can a Beard Shaping Tool Help You?
If you have a big night coming up and want to look sharp but can’t go to the barbershop, having beard shaping tools is a lifesaver.
First, if you don’t know how high your neckline should be, or where your cheek line should start — beard shaping tools help with that.
Sometimes you run into the problem of uneven lines. If you don’t have a good eye for balance, don’t fret. Beard shaping tools take all the guesswork out of your trim, so you end up with a perfect beard every time.
Beard Shaping Tools Save You Money
Let’s break down the math. A simple haircut usually runs about $20 on average. If you need a beard lineup you can expect your barber visit to cost you $40. If you take the beard lineup out of the equation, you’re looking at saving $2,000 per year (assuming you’re at the barber at least twice a month).
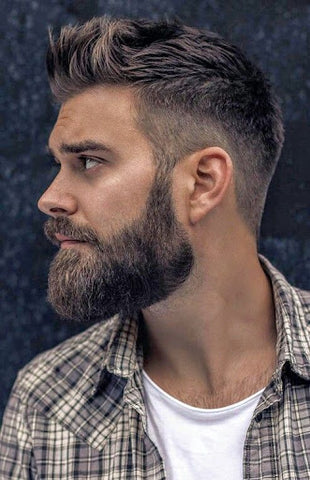
Choosing the Best Beard for Your Face Shape
When choosing which beard style you’re going to rock, your face shape is one of the most important factors to consider.
Of course, not every guy has a perfectly chiseled face, far from it actually — because of this, you want to accentuate the best parts of your face while minimizing your weaker features.
The most important thing is to work with what you have to look your best. Some guys don’t have the fullest beard and some guys naturally grow a lower cheek line.
Let’s have a look at the different face shapes and which beards go best with each one.

Oval shape: Consider yourself blessed in the world of beards if you have an oval face shape. An oval face shape lets you pull off pretty much any beard style.
One of the best beard styles we recommend for an oval face shape is a short, corporate beard. Basically, something neat and tidy to frame your face.
Round shape: If your face shape is round, you want to draw attention towards the center of your face, and away from the edges. An easy way to do this using your beard is to maximize your mustache and the front of your beard while trimming the sides along the jawline.
Great examples of this are the circle beard (aka a goatee with a mustache) — or a scruffy goat.
For bonus points, you can also elongate your chin by having a long beard.
Rectangle shape: Rectangle-face shapes are known to be longer. For this reason, you want to tone down your chin and add some width using your facial hair.
A beard stache is an excellent beard style choice for anyone with a rectangular face.
Square shape: If you have a square-shaped face, we’d recommend using your beard to add some length to your face (without making it wider).
A Verdi is a great beard shape to start with to achieve this effect.
Triangle shape: If you have a triangle-shaped face, your forehead will be the widest part of your face with narrower cheekbones and a sharp chin.
Softening your chin is your best bet when it comes to balancing a triangular face.
Aim for a longer beard style and be sure to keep it neat and rounded when you trim to soften your chin.
At the end of the day, you can rock any beard style you want with confidence.
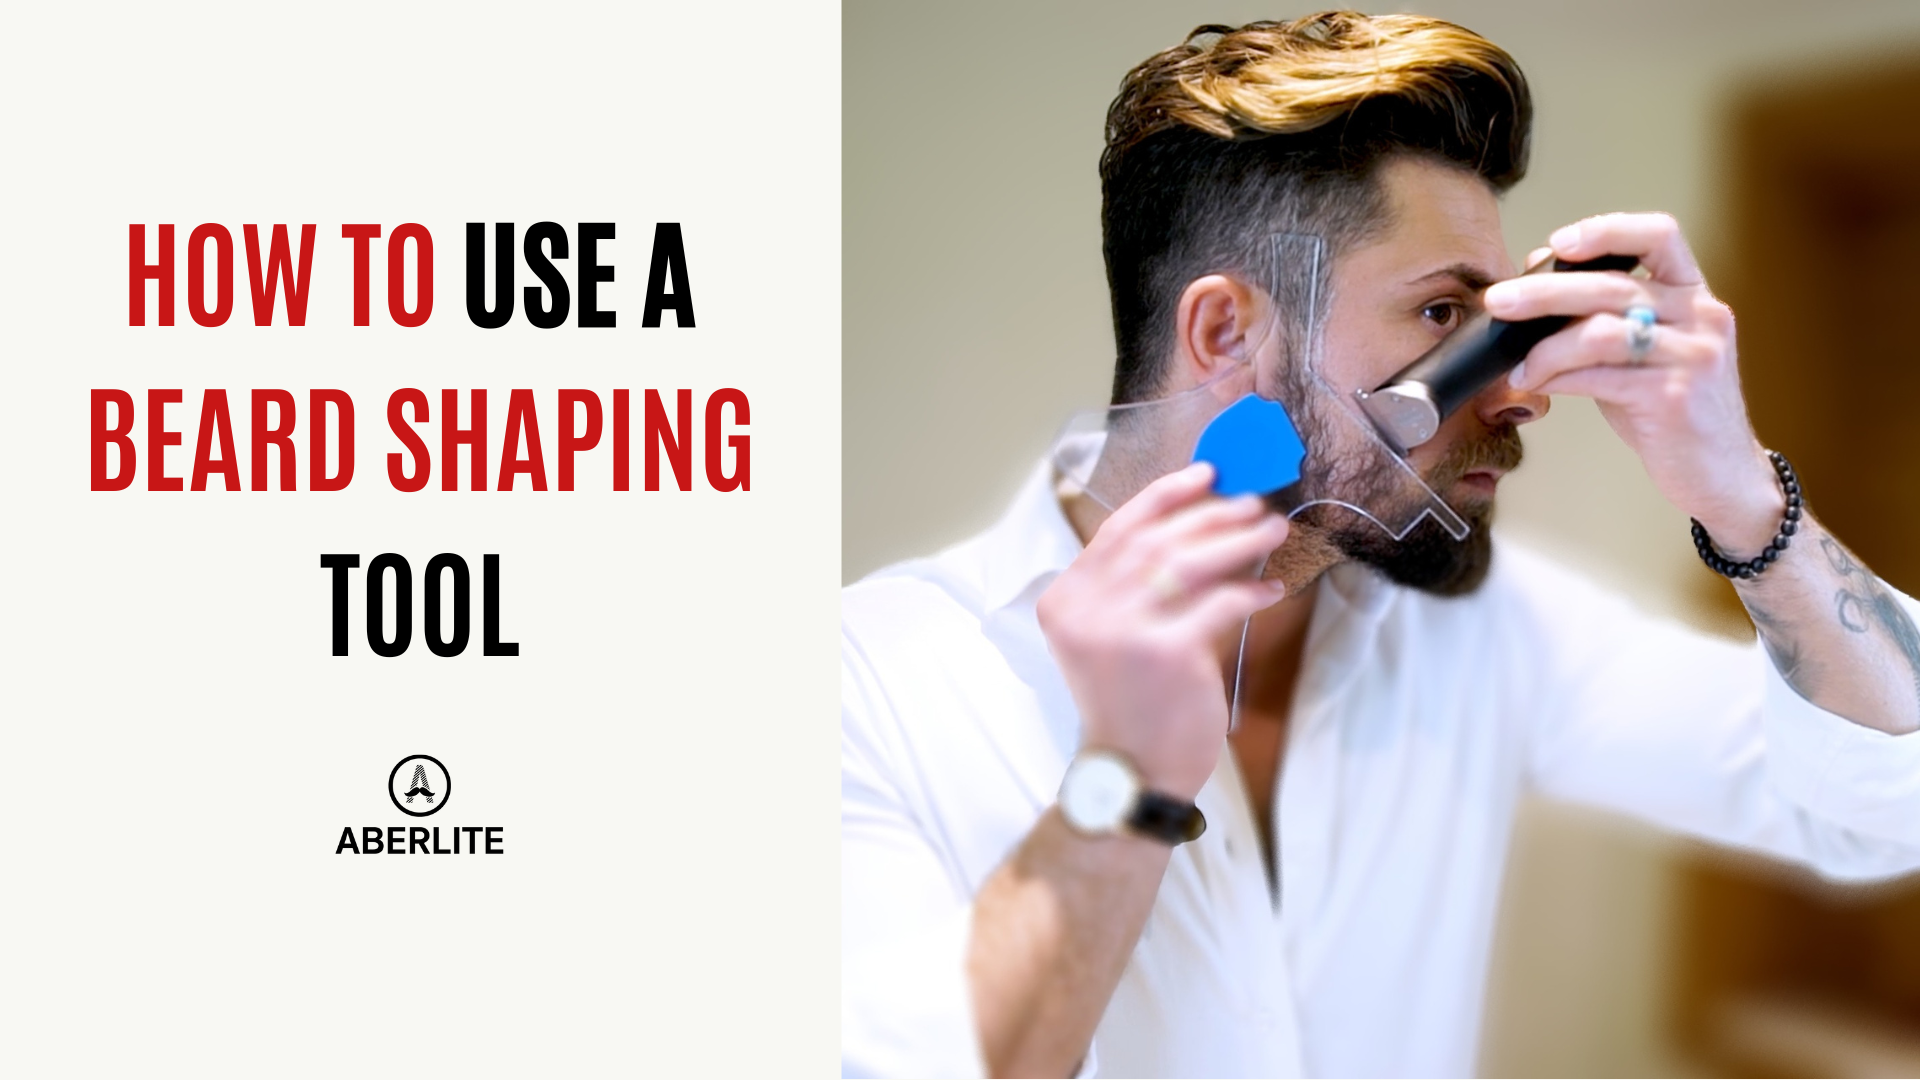
How to Use Your Beard Shaper
Now that you know which beard style to pick based on your face shape, you’ll need the right tools to trim your beard.
Beard shaping tools are used to enhance precision in your trim as well as act as a guideline for where to trim.
The most important part of using your beard shaper: Read and understand the instructions that came with the tool.
These instructions will provide you with the most accurate guidelines on how to use the tool. This guide is more geared to our Aberlite ClearShaper and FlexShaper — but we’ve included plenty of general tips you can use for any beard shape-up.
We’ll show you how to use your tools to shape your beard around your neckline, cheek line, jawline, and sideburns.
Shaping your beard may also call for the use of other tools such as a beard pencil, comb, trimmer, or razor. You’ll learn how to use these tools in this guide, too.

Start With a Sharp Razor
This step is optional. If you don’t want the sharpest lines on your beard, skip this section and move on down to the Precision Trimmer section.
First, a sharp razor will prevent ingrown hairs. Hair can snag on dull razors and tug them out of the follicle. This will be followed by irritated and swollen skin which will cause more ingrown hairs.
Additionally, you can take care of your razor by keeping it clean and sharp. Keep in mind — after a few uses, you’ll want to switch your razor out for a fresh one.

Wrap a Towel Around Neck and Shoulders
To prevent a mess, you’ll want to wrap a towel around your neck and shoulders. This will collect any dripping water or any hair that comes off your beard.
Also, a towel around your neck and shoulders means you have a wipe within your arm’s reach at all times.
Another way to prevent a mess is to use a beard bib. It’s a cape-like piece of fabric that goes around your neck, suctions onto your mirror, and catches falling hair.

Choose Your Beard Line
Next, you’ll want to choose your beard line. More specifically, your cheek line.
The Aberlite ClearShaper comes with 4 options.

Gentle curve cut: This one is great if you want to balance out the angular features on your face with a softer cheek line.
Deep curve cut: Just like the gentle curve cut, it's a softer option — but the curve ends up deeper and higher on your cheek line.
Straight step cut: This cheek line style is straight and angular. Straight lines are a great choice for those who’d like to balance out rounder features
Curved step cut: This variation of the step cut uses a curve that projects outwards for a fuller cheek line. It’s a nice option for an angular style that can help you balance a round face.
Comb Beard Gently in Direction of Growth
Now you’ll want to comb your beard hair gently in the direction of growth.
This is done to smooth out any straggling hair and make sure they don’t get cut too short during your trim. Combing also ensures that the hair on your face is evenly distributed which will help achieve a balanced look.
Place the Shaping Tool on Your Face
Place the beard tool on one side of your face with the style you chose earlier.
Keep in mind that the shaping tool simply serves as a guide. If you have very pronounced natural hair lines, do not cut too deep into them. The final result may end up looking strange.
A good rule of thumb to follow is to place the upper part of the tool parallel to your sideburns, and pivot as needed.
Some beard shaping tools are made using a transparent material. This comes in handy as you can see where your natural hair lines start.
Common Mistakes to Avoid
Oftentimes, our bearded brothers run into some hurdles when shaping up their beards. Here’s what you should avoid when using beard tools.
Mistake #1: The most common mistake we find is that guys don’t have enough patience when it comes to mastering beard shaping tools. If you’re not used to beard tools, using them will take some practice and patience. Don’t get discouraged if your first few attempts aren’t perfect!
Mistake #2: You can’t rush perfection. Hold the beard shaping tool steady and draw the lines in slowly and gradually.
Mistake #3: Not tracing in your lines. Barber tools can be hard to keep on your face. Because of this, we’ve included a barber pencil to make things easy for you! Instead of trimming with the tool held to your face, use the tool to draw a line on your face and trim along that line. You’ll notice the use of an extra hand is helpful!

How to Use a Beard Pencil
Just like the razor, this step is optional — but highly recommended. If you want a rougher trim you can simply use your trimmer to take some weight off your beard above your cheek line.
Before you start, know that the beard pencil isn’t suitable for a wet shave. The pencil line washes off when you add water to your face.
Use the placement of your shaping tool along with your barber pencil to draw an outline around the top of your cheek.
This line will act as a guide for trimming your cheek line.
Once you’ve traced this outline, you can remove the shaping tool. Both sides of your face should be symmetrical, so examine the lines for balance. You want to make sure you haven’t drawn too deep into your cheek line or sideburns.

Shave or Trim Along Your Lines
If you prefer a wet shave, we’ll sneak in a little pro tip here. We recommend using beard oil instead of shaving cream. This gives your razor the same gliding power as shaving cream, but it lets you see what you’re doing.
However, if you prefer shaving cream, that’s cool too. The towel you wrapped around your shoulders will come in handy to wipe off any excess shaving cream.
If you want to trim, we recommend using a fine trimming element for more precision. Alternatively, the native trimming element on just about any trimmer should do fine.
Whichever way you choose to shave and/or trim, go slowly until you get the hang of it. The more you practice, the faster you’ll be shaping your beard like a pro!

Clean Up the Edges
Now that your lines are trimmed or clean-shaven, you may want to touch up your edges and wipe off any excess shaving cream to get a clearer look.
This is a good time to trim some length off your beard using beard scissors if you want to shorten your beard or tame those split ends. The next step is to trim your neckline, and this will give you a better idea of your beard density.
Now that we’ve looked at the process for how to use your beard shaper, let’s go into detail on how to trim each area of your beard.
How to Trim Cheeks
Think of your cheek lines as the border around a masterful work of art.
For most guys, cheek lines are one of those areas you can’t go a long time without maintaining or you end up looking like Chewbacca.
Natural cheek lines can look great, but only when they connect fully without leaving space. They can also get in the way of your peripheral vision, and take away from your overall beard shape. To correct this, you’ll want to trim off that island of hair.
Just like your neckline, you want to use your trimmer to get rid of some weight on your cheeks first. If you start attacking the hair with your razor right away, you’ll most likely clog the razor or even cut yourself.
Don’t aim for perfect cheek lines at this stage, just get rid of the bulk.
Note: You can use the bottom of your ear as a guide to where your cheek line should start. Make a straight (or curved line) towards the corner of your mouth. This is generally the best height for your cheek line.
After this, grab your razor and shave with the grain. You can shave against the grain if you want, but keep in mind that the skin on your cheeks will be more sensitive, and you run the risk of ingrown hairs.
We also recommend a wet shave with beard oil on this area (it's one of our favorites) mainly due to the cheeks being a sensitive area.
After your shave, wash your cheeks clean of any excess hair or shaving cream, and top off that shave with some soothing beard balm or beard oil.

How to Trim Neckline
Your neckline will be the trickiest place to trim, mainly due to the lack of visibility.
One option is to use the ClearShaper to line up your neck (use one of the curved options to fit around your neck). The only issue here is that you’ll have to hold it in place with one hand and use the other hand to trim. Because of this, it might not be the right tool for your neckline, but it can help with a quick trim.
If you want a tool designed just for your neck, the FlexShaper is a perfect addition to your beard toolkit. Let’s go into detail on how to use it.
If you’re more of a visual learner, check out this 2-minute video from D.I.Y Hair Cuts that shows you how to use the Aberlite FlexShaper.

You’ll want to aim for two things — a straight line and symmetry. Here’s how to get them:
The first thing you’ll need is an electric trimmer. Trim off the fuzz that has grown around your beard and neck to soften up your neckline. If your neckline is too thick, you won’t know where to trim and you’ll end up like Drew here.

From here, with your beard trimmer angled downward, find the line where your head meets your neck. Placing two fingers above your Adam's apple is a handy way to find out where your neckline should start. Shave the entire area below that.
Most of the density of your beard is around the neckline, so be wary of trimming too high.
A common mistake some dudes make is trimming their neckline flush with their jawline. Again, you’ll lose a lot of perceived volume if you do this.
If you’re using the FlexShaper, make sure you’re not placing it too high or too low on your neck. You can tighten or loosen the adjustable straps as needed. We recommend using the barber pencil to trace your perfect neckline.

If you want to go down the route of using a razor, a great time to apply beard oil or beard balm is immediately after your shave. This will help soothe your freshly shaved skin.
A correctly positioned neckline will make a massive difference when it comes to growing a full beard.
How to Trim Sideburns
Trimming sideburns with a beard can be tricky. You have to figure out how high to trim and ensure that you don’t hack off part of your beard.
The goal here is to have short, clean sideburns that blend into your beard.

If you’re a die-hard fan of the Clearshaper, you can also use it for your sideburns! Find an edge that you like and line it up on either side of your sideburns (see image above). You can trim directly off the tool, or use the barber pencil.
If you don’t have the Clearshaper or prefer a freehand method you’ll need a cordless trimmer and a beard comb.
- Start by combing your sideburns downwards to make sure all your hair is facing the same direction. You can also use a beard brush for this
- Next, take the guard you want to use and run it through your beard to gauge the amount of hair you’ll be cutting off. If you’re unsure, you can always start with the biggest guard and work your way down.
- Trim from the bottom of your sideburns with the largest guard. Slowly work your way up starting at the bottom of the ear and transition to smaller guards as you get closer to the top of your sideburns.
Alternatively, you can also use the same guard length entirely through your sideburns if you don’t prefer the faded look.
The Bottom Line
- If you need a neat beard and can’t afford frequent barber shop visits, beard shaping tools could be the cost-effective answer to your problems.
- You’ll need knowledge of face shapes (and a little bit of experimentation) to know what style to choose for your face. You can also get your beard professionally lined up for an idea of your perfect beard shape.
- Trimming your beard is a skill you need practice and patience to develop. Revisit this guide if need be and master the art of shaping your beard.
We’ve told you everything you need to know to get started with beard shaping tools. What are you waiting for? Get to it! We’re confident you’ll put your newfound knowledge to excellent use and sculpt an epic beard. Be sure to send us pictures at support@aberlite.com!

Need to know how to grow a beard before you start shaping? Check out our full run-down on beard growth and maintenance here.
Tired of reading? Want to talk to an actual human? Shoot us an email at support@aberlite.com. We’d love to hear about your concerns (bearded or otherwise).